
This guide contains affiliate links. If you book through them we may earn a small commission at no extra cost to you, which helps keep this site independent.
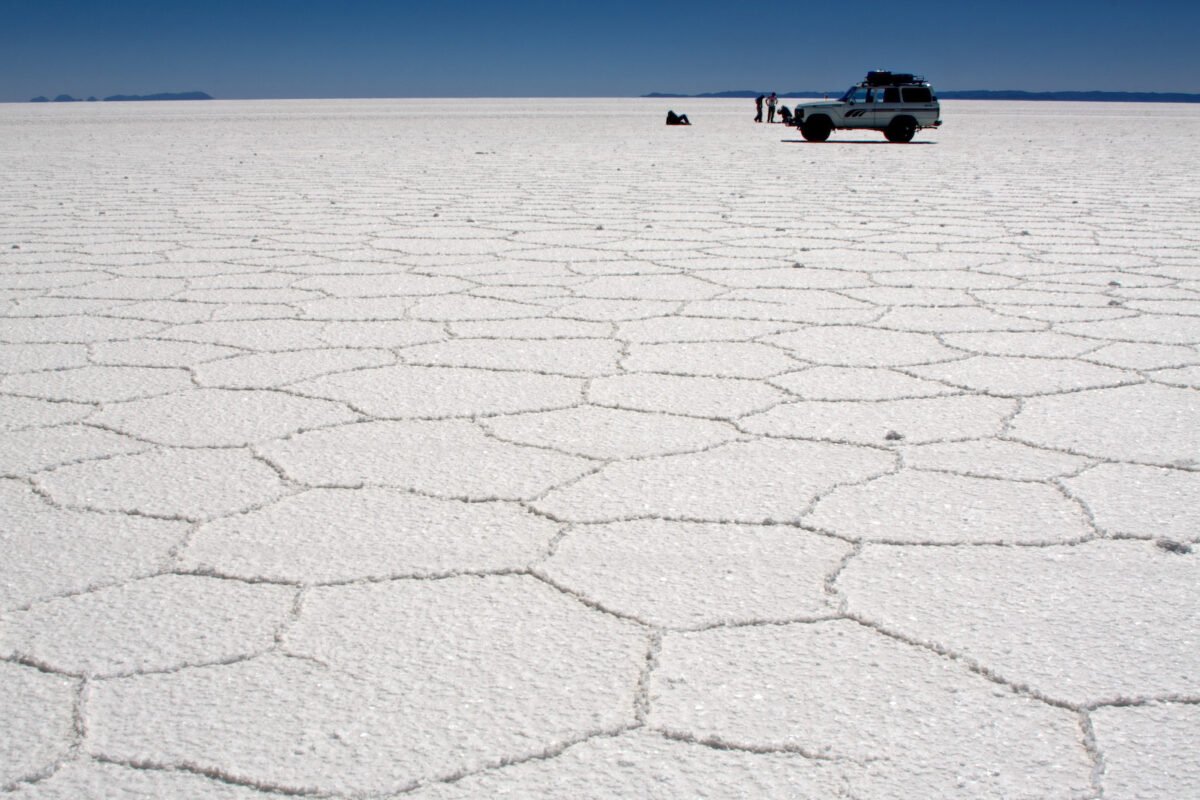
There are very few places on the planet where you can make a friend stand on the palm of your hand, escape from a toy dinosaur, or climb out of a bottle of wine. The Salar de Uyuni is the most famous of them. Its surface is so flat that the difference in height across more than 10,000 square kilometers is famously tiny, and in the dry season the white crust stretches to a horizon with no trees, no buildings and no visual clues about distance. That emptiness is what makes forced-perspective photography possible.
Every tour stops for these photos, but the results vary enormously. Some groups go home with funny, sharp, shareable images; others end up with blurry props, crooked horizons and friends who look simply far away rather than tiny. This guide gives you 25 ideas that work, explains the camera and phone settings behind them, lists the props worth packing and covers the timing and season questions that decide whether you get a perspective shot or a mirror reflection.
How forced perspective works on the salt flat
Forced perspective is an optical trick. A small object close to the camera and a large object far away appear to be the same size when the camera cannot tell how far apart they are. In a city, buildings, shadows and texture give your brain those distance clues. On the Salar de Uyuni they almost disappear. The background is uniform white and blue, the horizon is perfectly straight, and there are no reference objects. Your brain assumes everything is on the same plane, so a person 20 meters away standing next to a cup that is 50 centimeters from the lens looks like a tiny figure next to a giant cup.
Two technical conditions make or break the effect:
- Everything must be sharp. If the prop is sharp and the person is blurry, or the other way round, the brain immediately understands that they are at different distances. You need a large depth of field.
- The contact point must line up. If your friend is supposed to stand on a hand, their feet must sit exactly on the palm in the frame. A few centimeters of gap ruins the illusion.
Everything else in this guide, from the choice of lens to how low you hold the phone, is about controlling those two conditions.
Camera and phone settings that work
Smartphones are excellent for perspective photos because their small sensors naturally give a deep depth of field. Most professional photographers on the salt flat use phones for these shots and save their big cameras for landscapes and sunsets. The table below summarizes what works best.
| Device | Lens or mode | Key settings | Why it works |
|---|---|---|---|
| Smartphone | Main (1x) lens | Standard photo mode, tap to focus on the prop, lock exposure, lower exposure slightly | Small sensor keeps both prop and person sharp |
| Smartphone | Ultra-wide (0.5x) | Use for very close props and big scenes | Huge depth of field, exaggerates size difference |
| Smartphone | Portrait mode | Avoid | Artificial background blur destroys the illusion |
| Mirrorless or DSLR | 16 to 35 mm wide angle | Aperture f/11 to f/16, ISO 100 to 200, shutter 1/500 s or faster | Deep depth of field and frozen movement in bright light |
| Mirrorless or DSLR | 50 mm or longer | Not recommended for perspective | Shallow depth of field separates prop and subject |
| Action camera | Wide default | Use linear or narrow mode to avoid curved horizon | Extremely deep focus, very durable on salt |
The golden rules of composition
- Get low. Put the camera almost on the salt, ideally lying flat on your stomach. The lower the lens, the more the horizon helps hide the distance between subject and prop.
- Focus on the prop. On a phone, tap on the prop and lock focus and exposure. With small sensors the background will still be sharp.
- Lower the exposure. The white salt fools the meter and blows out detail. Slide the exposure down by about one stop.
- Keep the horizon straight. Turn on the grid in your camera app. A tilted horizon makes the scene look staged in the wrong way.
- Use a director. One person behind the camera calls the moves: “step left”, “lift your arm”, “freeze”. The people in the distance cannot see the frame, so a clear system of hand signals saves time.
- Shoot in bursts. Jumps and poses often need ten attempts. Burst mode helps you catch the right instant.
25 perspective photo ideas that really work
Here are tested ideas grouped by type, from the easiest to the most creative. Most tour drivers know several of them and are happy to help with direction.
Classic ideas (easy, five minutes each)
- 1. Standing on a hand. Your friend stands 15 to 20 meters away. The photographer’s partner holds out an open palm close to the lens. The feet must sit exactly on the palm.
- 2. Held between fingers. Pinch the air in front of the lens as if lifting a tiny person by the head.
- 3. Stepped on by a giant. One person lies on their back close to the camera while another lifts a shoe above their head from very close range.
- 4. Inside a hat. A hat on the salt near the camera and the group “climbing out” of it in the distance.
- 5. On top of a water bottle. One person balances on the cap of a bottle placed close to the lens.
- 6. The giant and the dwarf. Two friends at very different distances, one appearing to pat the other on the head.
- 7. Kicked by a boot. A rubber boot close to the camera looks ready to kick a running group.
Props and toys (bring them from home)
- 8. Dinosaur chase. A toy dinosaur near the lens and your group running away in panic in the distance. This is the most popular Uyuni photo for a reason.
- 9. Pringles can tunnel. Friends climbing in or out of a chip can. The tall shape works perfectly.
- 10. Wine bottle escape. A group pours out of a bottle lying on its side.
- 11. Toy car ride. A small car or jeep model in front of the camera with a friend “driving” it from far away.
- 12. Giant beer or soda can. Someone leans against an enormous can.
- 13. Bowl of food. A friend sits in a bowl or plate as if about to be eaten.
- 14. Godzilla attack. Use any monster toy and a “city” of water bottles.
- 15. Flag of your country. A small flag close to the lens planted next to a “tiny” traveler.
Creative and group ideas
- 16. Stacked friends. Several people at different distances so each appears to stand on the head of the one before.
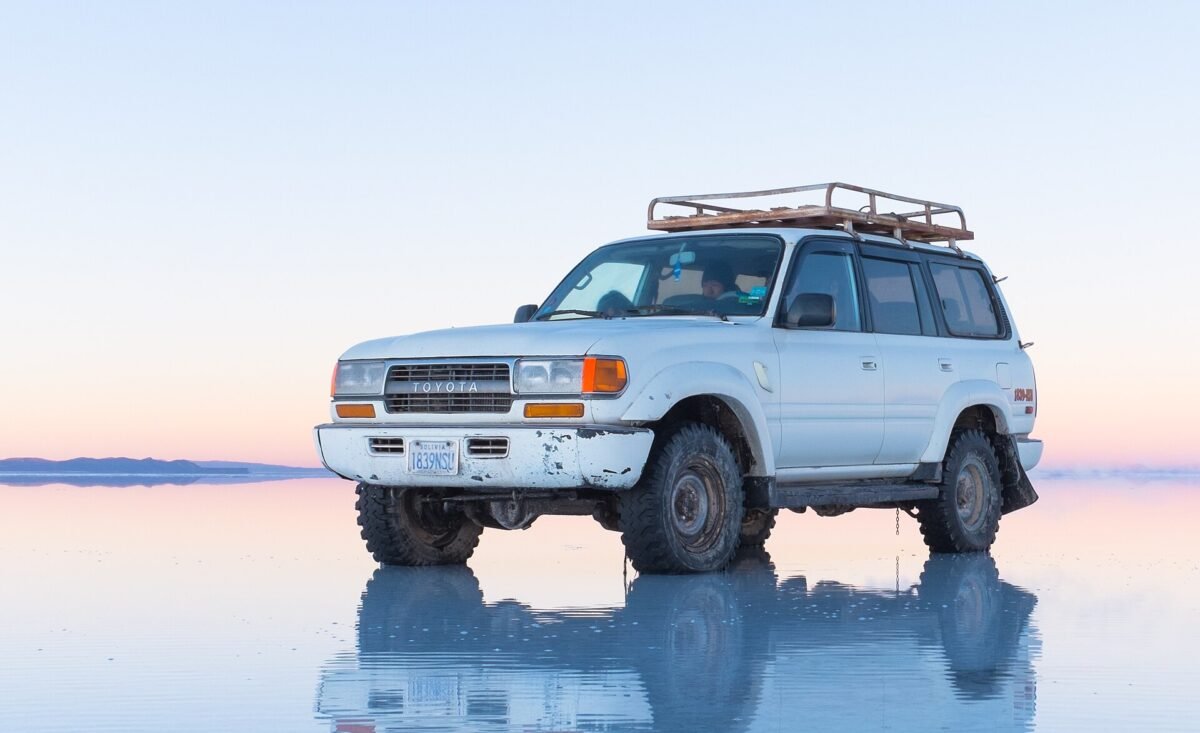
- 17. Lifting the jeep. One person close to the camera “lifts” the 4×4 parked far away.
- 18. Walking a person on a leash. A dog leash or string held near the lens with a friend on all fours far away.
- 19. The giant selfie. One person holds a phone close to the camera while the group poses far behind.
- 20. Sunglasses window. A pair of sunglasses close to the lens framing the group in each lens.
- 21. Footprint stamp. A shoe sole close to the lens about to flatten a group lying down.
- 22. Jumping over an obstacle. Friends jump over a small object such as a matchbox placed near the camera.
Video and moving ideas
- 23. Walking out of a box. A short video of friends marching out of a small cardboard box.
- 24. Stop-motion parade. Toys and people taking turns moving across the frame.
- 25. The magic hat. Film a group emerging one by one from under a hat, then reverse the clip.
Props to pack from home
Uyuni shops sell plastic dinosaurs and souvenirs, but the choice is limited and prices are higher than at home. These small items fit in a daypack and give you plenty of options:
| Prop | Weight and size | Best shot | Tip |
|---|---|---|---|
| Plastic toy dinosaur | Light, 15 to 30 cm | Dinosaur chase | Choose an open-mouth pose for drama |
| Pringles can | Light, 25 cm | Tunnel or escape | Carry it empty and fill it with socks |
| Wine or beer bottle | Heavy | Pour-out escape | Use an empty bottle and pack it out |
| Toy 4×4 or car | Light, 10 to 15 cm | Driving shot | Bright colors stand out on white salt |
| Small flag | Very light | National pride photo | Avoid long fabric that blows in the wind |
| Leash or string | Very light | Walking a “pet” | Keep it taut so it lines up with the subject |
| Rubber boots | Medium | Giant kick | In the rainy season you will wear them anyway |
| Mini tripod | Light | Self-timer group photos | A flexible model can grip a jeep mirror |
On Amazon you can find plastic dinosaur figures, a flexible mini tripod for group shots without a photographer, and Bluetooth phone remotes so you can trigger the camera from inside the scene.
Private photo tour
Get the shot without a tour group rushing you
Private Uyuni tours let you stay longer at the best photo spots and often include drivers who know every perspective trick. Compare options with English descriptions and free cancellation.
Your own jeep and schedule · Free cancellation on many dates · Verified reviews
Best time of day for perspective photos
Perspective shots need hard, even light and a clean horizon. That makes late morning to early afternoon the best window, roughly between 10 am and 2 pm. The sun is high, shadows are short and do not reveal the distance between subject and prop, and the salt is at its brightest white.
Sunrise and sunset are spectacular for landscapes and silhouettes, but long shadows give away the trick. Use those hours for reflections and colorful skies, and plan your perspective session around lunch. On most one-day and three-day tours, the driver stops in the middle of the flat for exactly this reason.
Dry season vs rainy season for perspective photos
The season changes everything on the salt flat. Perspective photos need a dry, hard surface and a clear horizon. The mirror effect needs a thin layer of water. You can rarely have both in the same spot at the same time.
| Factor | Dry season (May to November) | Rainy season (December to April) |
|---|---|---|
| Surface | Hard white crust with hexagonal patterns | Thin layer of water, sometimes deep |
| Perspective photos | Excellent, the main activity | Possible only on dry patches |
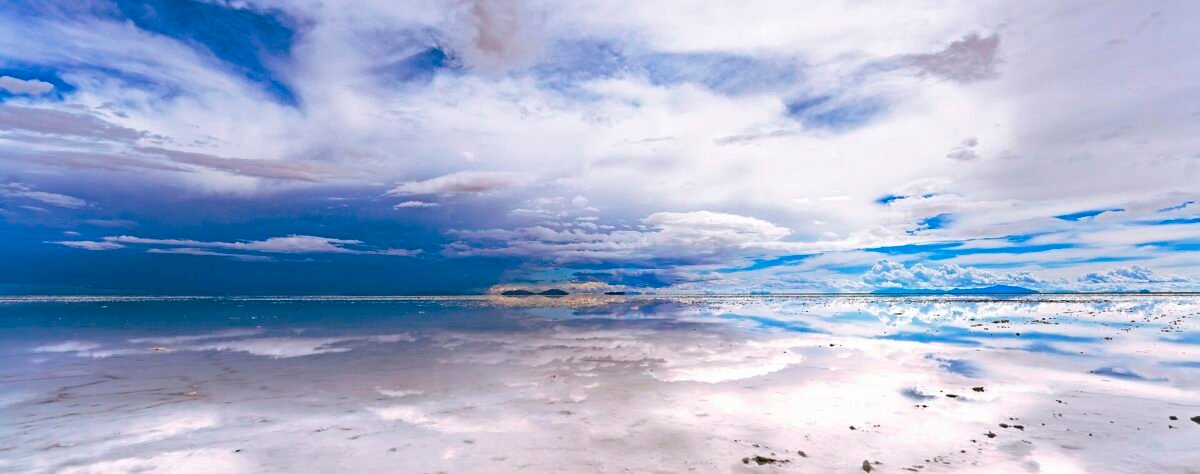
| Mirror reflections | Not possible | The main attraction |
| Sky | Deep blue, almost no clouds | Dramatic clouds, chance of storms |
| Temperature at midday | Cool, often around 10 to 15 °C | Mild, often around 15 to 20 °C |
| Access to Isla Incahuasi | Normal | Often blocked by water |
| What to wear | Warm layers and sunglasses | Rubber boots and waterproof bag |
If you want both styles of photo, aim for the transition months. In late March and April, and sometimes in late November and December, parts of the flat are dry while others still hold water. Read our month-by-month guide to the mirror effect and the dry season guide to choose your dates. Uncover the Andes also compares the two seasons from a photographer’s point of view in its article on Uyuni dry season vs wet season photography.
Perspective photos in the rainy season
You can still do perspective shots between December and April, but you need to adapt:
- Look for dry areas. Drivers know the spots near the edges of the flat where the crust is above the water.
- Use the reflection as part of the trick. A dinosaur standing in water creates a mirrored double, and a group walking out of a reflected bottle can look even more surreal.
- Protect your gear. Salt water is corrosive. Keep phones in a waterproof pouch and wipe everything with a damp cloth and fresh water at the end of the day.
- Wear rubber boots. Most tours provide them or rent them for about Bs 20.
Mistakes that ruin perspective photos
- Using portrait mode. The software blurs the background, so the illusion collapses.
- Standing too close. The person in the distance should usually be 15 to 30 meters away. If they are too close, they look normal size next to the prop.
- Shooting from eye level. The higher the camera, the more ground you see between prop and person, which reveals the trick.
- Ignoring the contact point. Feet floating above a hand, or a dinosaur’s mouth that misses the group, makes the photo look accidental.
- Bright clothing problems. White clothes disappear against the salt. Choose strong colors like red, yellow and blue.
- Leaving props behind. Bottles and toys left on the flat are pollution. Pack everything out.
Protecting your camera and phone on the salt
Salt dust is fine and abrasive, and the ultraviolet light at 3,650 meters is intense. A few habits keep your gear alive:
- Do not lay your camera directly on the salt. Use a lens cloth, a thin bag or the cover of the tripod.
- Change lenses inside the jeep, not in the wind.
- Keep batteries warm in an inside pocket, especially in the dry season mornings, when temperatures can be well below freezing.
- Wipe the camera and phone with a slightly damp microfiber cloth at the end of the day.
- Carry a power bank; multi-day tours have limited electricity.
Protect yourself too. Reflections from the white salt are harsh, and sunburn happens fast. Use high-protection sunscreen such as EltaMD UV Clear SPF 46 and wear polarized UV400 sunglasses. For a complete list, see what to pack for the Salar de Uyuni.
Protect your gear and trip
Cameras, altitude and remote roads
Travel insurance with medical evacuation is essential on the salt flat, where the nearest hospital can be hours away. SafetyWing is flexible, affordable and easy to buy online.
Buy online after departure · Monthly plan · Medical evacuation included
Where on the salt flat to take perspective photos
Tours usually stop in the central part of the flat, a long way from any island, where the horizon is completely empty. Common stops include the area around the Dakar Rally monument and the flags near the old Playa Blanca salt hotel, but those places are crowded and full of objects. Ask your driver to continue a few kilometers until you see nothing but salt in every direction. Avoid shooting toward Isla Incahuasi or the mountains, which give the eye a scale reference. Our guide to Isla Incahuasi explains what to see on the island itself.
One-day tour, three-day tour or private tour?
All tours stop for perspective photos, but the time you get varies. Shared one-day tours usually give you around 30 to 45 minutes. Three-day tours may stop for perspective photos on the first day only. Private tours let you choose the location, light and duration, which is ideal if photography is a priority. Our comparison of 1-day vs 3-day vs 4-day Uyuni tours explains the differences in price and schedule.
Choose your tour
From 1-day trips to sunset and stargazing
Compare Salar de Uyuni tours with fixed prices, clear inclusions and English descriptions. Many departures include time for perspective photos and a sunset stop.
Instant confirmation · Free cancellation on many tours · Reviews from real travelers
Where to stay for an early start
If you want to photograph the salt flat at different times of day, staying close to it helps. Salt hotels around Colchani are about 20 to 30 minutes from the flat and let you combine morning, midday and sunset sessions. Our guide to salt hotels near the Salar de Uyuni compares the main options.
Sleep close to the salt
Wake up minutes from the flat
Compare hotels in Uyuni and Colchani, check heating and breakfast and read guest reviews before booking on Hotels.com.
Search Here for Hotels.com Best Hotel Deals!
Compare hotels in one place · Guest reviews · Member prices on many stays
Frequently Asked Questions
What is the best time of day for perspective photos in Uyuni?
Late morning to early afternoon, roughly 10 am to 2 pm, when the sun is high and shadows are short. Long shadows at sunrise and sunset reveal the distance between prop and subject and spoil the illusion.
Can I take perspective photos in the rainy season?
Yes, but only on dry parts of the salt flat. Drivers know where to find dry crust between December and April. The rest of the flat is better for mirror reflections in that season.
Is a phone good enough for Salar de Uyuni perspective photos?
Yes. Phones are ideal because their small sensors keep both the close prop and the distant person sharp. Use the standard photo mode or the ultra-wide lens and avoid portrait mode.
What props should I bring to the Salar de Uyuni?
Popular choices are a plastic dinosaur, a Pringles can, an empty wine bottle, a toy car, a small flag, a leash or string and rubber boots. Choose light, colorful objects and pack all of them out.
How far away should the person be in a perspective photo?
Usually 15 to 30 meters, depending on the size of the prop and the lens. Use a director behind the camera and hand signals to adjust the distance until the contact point lines up.
What camera settings should I use on a DSLR or mirrorless camera?
Use a wide angle lens between 16 and 35 mm, an aperture of f/11 to f/16, ISO 100 to 200 and a fast shutter speed. Focus on the prop and check that the distant subject is also sharp.
Do tour guides help with perspective photos?
Yes. Most drivers on Uyuni tours know classic poses and will direct or take the photos. On private tours they can spend much longer and suggest creative ideas.
Can I buy props in Uyuni?
Some shops and market stalls in Uyuni sell plastic dinosaurs and souvenirs, but the choice is limited. It is easier and cheaper to bring your props from home.
Why do my perspective photos look fake?
The most common reasons are portrait mode blur, shooting from too high, a gap between the prop and the subject, or long shadows. Get the camera low, keep everything sharp and line up the contact point carefully.
Will salt damage my camera?
Salt dust and salt water can damage gear over time. Do not place the camera directly on the salt, change lenses inside the vehicle, keep phones in a waterproof pouch in the rainy season and clean everything with a damp cloth afterward.
Conclusion: plan the shot before you reach the salt
The best Salar de Uyuni perspective photos are rarely improvised. They come from travelers who pack a couple of simple props, know which settings keep everything sharp, choose the midday light and work as a team with a director behind the camera. Prepare a short list of ideas from this guide, decide whether you want dry-season perspective shots or rainy-season reflections, and book a tour that gives you enough time on the salt.
If photography is the main goal of your trip, a private tour is worth the extra cost. Compare options, lock in your dates and get ready to make your friends tiny.
Compare flights
Flying to Uyuni? Find the best fare
The domestic hop from La Paz saves a long overnight bus and gives you more time on the salt. Compare fares to La Paz and Uyuni on Skyscanner.
Hundreds of airlines · Flexible dates · No booking fees
Want help planning a photography trip to Uyuni? Message us on WhatsApp at +1 (210) 264-6444.